How to Quilt with a Regular Sewing Machine?
Quilting is a rewarding craft, and the best part? You don’t need an expensive quilting machine to get started. You can create cozy, beautiful quilts with just your regular sewing machine and a few basic tools. Let’s explore this simple, cost-friendly method of quilting at home.
Before getting deep into the process, first, we will know and understand the basics of quilting. Quilting involves stitching together layers of fabric consisting of:
- Top layer – the quilt top.
- Middle layer – for batting(warmth).
- The bottom layer – is a backing fabric.
The stitching pattern not only holds the layers together but, also adds texture and design to the quilt. Let us explore quilting with a regular sewing machine without investing in a specialized quilting machine. Isn’t it amazing!
I tried and tested this technique and successfully quilted for my niece Pearl on her 5th birthday with the regular sewing machine.
Reason – It is cost-efficient and accessible.
How did I do? With just a few tools, adjustments, and techniques, I transformed my sewing machine into quilting.
Note – Of course, the specialized quilting machine has features like a larger throat space and an advanced stitching pattern
ESSENTIAL TOOLS AND MATERIALS NEEDED
To quilt successfully with a regular sewing machine you need to arrange these:
- Sewing Machine – here I am talking about your regular sewing machine until you decide to take quilting as a profession. It works perfectly for small to medium quilts.
- Walking Foot – a special foot that can be attached to a sewing machine to help feed thick layers of fabric evenly through the machine.
- Quilt Needle – I prefer 80/12 needles they are perfect for piercing and quilting.
- Quilting Thread – 100% cotton thread or cotton polyester blend 50wt thread both are fine. For me, cotton polyester blend thread is more convenient as it feels easy to sew.
- Ruler – many rulers are available in the market but I like a 6″ x 24″ clear Omnigrip, great for accurate cutting.
- Pins or basting spray – These help to keep the quilt layers together while sewing.
- Rotary cutter and mat – I prefer the size 24” x 18” with both side measurements.
- Quilt batting – a thick layer used to make padding in the quilt between the top and bottom layers providing warmth and texture.
- Quilting Fabric – High-quality cotton fabric ideal for quilting projects for back and front coverage of the quilt.
- Binding: is a strip of fabric used to bind the raw edges of the quilt to make a border to secure the quilt and give a finished look.
- Masking tape: used to draw straight lines for sewing
- Painter tape: used to secure the backing to the ground while making the quilt sandwich.
- Marking pencil: used to make the desired measurements.
- Pair of Scissors
- Seam ripper
Advice – When you first do the quilting try on leftover pieces in your stock.
PREPARING QUILT TOP
This involves joining together your chosen fabric squares or shapes into a design.
Cutting fabric pieces – Use a rotary cutter, mat, and ruler to cut the fabric according to your quilt design.
Piecing the quilt top – Sew the fabric pieces together using an ¼ inch seam allowance.
Advice – Prewash your fabric to prevent shrinkage and discoloration. Press the fabric pieces to ensure accurate seam.
PREPARING A QUILT SANDWICH
The first and most important step is preparing a quilt sandwich. This consists of 3 easy steps backing, basting, and batting.
- Backing: the back or the lowermost layer of the quilt.
- Batting: is the thick layer of material used between the top and the backing layer.
- Basting: is the process of holding the three layers of the quilt together temporarily, using safety pins, basting spray, or long-basting hand stitches. It can be removed easily after the quilting.
Advice – basting spray is good for small to medium size quilts and safety pins are more stable for larger quilts.
How to make a quilt sandwich?
Step 1- Spread the back fabric firmly on the floor with the front side facing the floor (that means the print side down). The spreading process must be done with care to avoid wrinkles.
Tips – Use 100% cotton fabric for your first project to avoid slipping off the fabric while sewing.
Step 2- with the help of painter’s tape stick the backing to the floor on one side, you are done with one side, stick the opposite side. Repeat this process with the other sides also.
Tips – once the sticking part is over go 4 to 5 steps back to see the whole backing at one glance, by this you can easily make out if there is any alignment problem.
Step 3- now place the basting over the backing layer and spread it till both the layers are properly set with each other.
Tip – use cotton basting if you are a newbie, as I did, believe me, it’s so easy to set and sticks to the place without much hassle.
Step 4- Place the top fabric to complete the quilt sandwich process.
Tips – always keep the backing and the batting bigger than the top fabric.
Step 5 – Pin the fabric at regular intervals with safety pins. It secures the whole quilt sandwich. This is time-consuming initially but will save time while you are sewing.
Tips – I measure the regular intervals with my palm for the pinning distance.
ADVANCED QUILTING TECHNIQUES:
Free-motion quilting:
Once you have gained confidence with straight-line quilting and understand how to layer and stitch a basic quilt sandwich, it’s time to stretch your skills. Even with a regular sewing machine, you can explore advanced quilting techniques that add dimension, texture, and artistry to your work.
One great way to start is by using a walking foot, which is also known as an even feed foot. It ensures all layers feed evenly under the needle. This simple upgrade helps prevent puckering, especially on larger quilts.
Many quilters also wear quilting gloves, which give them a better grip and control as they move the fabric. You can try free-motion quilting.
By dropping the feed dogs and using a darning or free-motion foot, you can guide your quilt in any direction, as if you are drawing with thread. You can stitch feathers, spirals, leaves, or even words into your quilt.
Advanced quilting with a regular sewing machine is all about learning to control movement, adjust tension when needed, and practice until your hands and eyes move in sync.
Ruler quilting:
It’s a technique that allows you to stitch patterns using acrylic quilting rulers and a ruler foot ( a special presser foot designed for this purpose). It involves guiding the fabric while tracing the edge of a shaped ruler, like a circle, arcs, or waves. It gives even lines and designs that are not possible with freehand.
Ruler quilting is possible on a regular sewing machine with the right setup. You will need a flat extension table for extra support and a grippy surface under your rulers to prevent slipping.
I remember the first time I quilted a cathedral window motif using a ruler. The effect was clean and satisfying, so it became my special baby quilt.
Thread painting and textured quilting:
It’s a creative form of quilting where you use thread almost like a paintbrush, layering stitches to create shading, shapes, and texture directly onto the fabric. Unlike the other 2 previous techniques, the difference is that here the focus is more on design than just stitching layers together.
You can fill in floral shapes, draw landscapes, and add dimension to existing patterns on your quilt top.
PREPARING YOUR MACHINE
Now it’s the time to get your table set for the project. Use a bigger table for sewing if you don’t have one then just remove all the extra things from your table and make it clean. This will allow them to work freely.
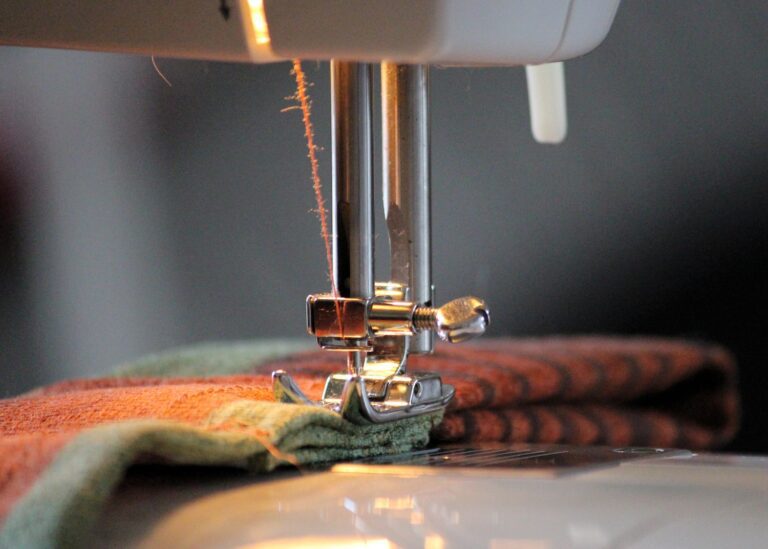
Install the walking foot to your machine. Raise the presser bar lever, put the walking foot around the sink, slide the foot up and down unit it is aligned with the hole, then insert the screw and tighten it. This is an important tool in this process without which sewing a quilt on a regular machine is nearly impossible.
Change the needle and thread the machine for quilting.
Note – You can purchase a universal walking foot which fits almost all the sewing machines.
STITCHING PROCESS
Select the side you want to start your project to be sewn. Mark the line with a marking pencil and using the ruler, stick the masking tape to enable you to stitch the line straight without much practice. Always start at the middle of any side to stitch, and finish at the end. Then move to the other half.
Roll the quilt sandwich from the corner to the middle from both sides to make the quilt narrower and handy while stitching.
Once the stitching is complete, put the quilt back on the floor, spread it flat, and check whether all the stitches are properly sewn.
Now put the self-heating mat under the sides of the quilt and cut the edges with the help of the rotatory cutter.
Use the binding strip and stitch it on all sides of the quilt.
Tip: I recommend stitching the binding strip to the backing side first. This will cover extra stitches when finishing the binding strip for the top.
When the whole process is done use the scissors to cut any extra threads hanging on the quilt.
Conclusion:
Quilting with a regular machine with the right tools, techniques, and patience can create beautiful quilts for your home or as a gift to show your creativity.

One Comment