How to Read a Sewing Pattern?
My niece Mia, imagined herself designing beautiful dresses, stitching them together, and wearing something unique. One day she picked up her first sewing pattern with excitement. But as soon as she unfolded the delicate paper, her enthusiasm turned to confusion. Strange symbols, dotted lines, and complicated instructions filled the page.
What does all this mean? If this is the same question for you, then don’t worry.
Learning to read a sewing pattern is like learning a new language. Once you understand the basics, everything starts to make sense. This guide will help you through everything you need to know like decoding the symbols, to cutting and sewing your fabric with confidence.
The basic components of a sewing pattern are:
- Choose the right pattern – Select a pattern that matches your skill level.
- Understand the Pattern envelope – It contains a design, fabric recommendations, and size chart.
- Gather your tools – Ensure you have scissors, measuring tape, pins, and fabric chalk.
- Instruction sheet – Step-by-step guidance for assembling the garment.
- Pattern pieces – The tissue paper outlines are used to cut the fabric.
- Symbols and markings – Important guides for cutting, sewing, and assembling pieces.
Each of these sections have valuable information that will make your sewing experience smoother and more enjoyable.
Understand the pattern envelope – This is the first thing you will see when you are purchasing a sewing pattern. It contains important information to help you determine if the pattern is suitable for your project.
On the front side, contains an image or illustration of the finished garment, showing variations or design options. On the back side, you will find vital details like fabric recommendations, variations of concepts like zippers, buttons, interfacing, and the size chart.
It also provides the fabric’s length and width for different sizes, ensuring you purchase the right quantity of material.
Advise – It’s important to compare your body measurements with the given size chart, as sewing pattern sizes often differ from standard sizes.
What is inside the pattern envelope?
Once you open the envelope, you will find three key components—the pattern tissue paper, the instruction sheet, and sometimes additional guides, adjustment notes, or templates to understand the construction process, making it easier to follow and avoid mistakes.
Pattern tissue paper – It contains the actual pattern pieces, printed on lightweight, semi-transparent paper. These pieces are marked with lines, symbols, and instructions indicating where to cut, fold, or stitch.
This shows how to place pattern pieces on the fabric before cutting. It includes:
Cutting layouts for different fabric widths (for example—44” or 60” fabric).
Right side and wrong side of fabric indications to help avoid mistakes.
Fabric fold placement shows which pieces should be placed along a fold.
Tip – Follow the cutting layout exactly to avoid fabric waste.
As patterns usually include multiple sizes, you may observe overlapping lines for different size options. Follow these when selecting your size:
Use a highlighter or tracing paper to outline the correct size before cutting.
If between sizes, blend between them by gradually shifting the cutting line.
Carefully follow the right lines for each piece to avoid confusion.
Sewing patterns often need modifications for a perfect fit. Common adjustments include:
Lengthening or shortening – Patterns often have a designated line for adjustments. Cut along this line and either add or remove paper to modify the length.
Widening or narrowing – If adjustments are needed at the bust, waist, or hips, alterations can be made by redrawing lines accordingly.
Blending sizes – If your body measurements fall into different sizes, for example—a smaller waist but wider hips, you can smoothly transition between sizes when cutting.
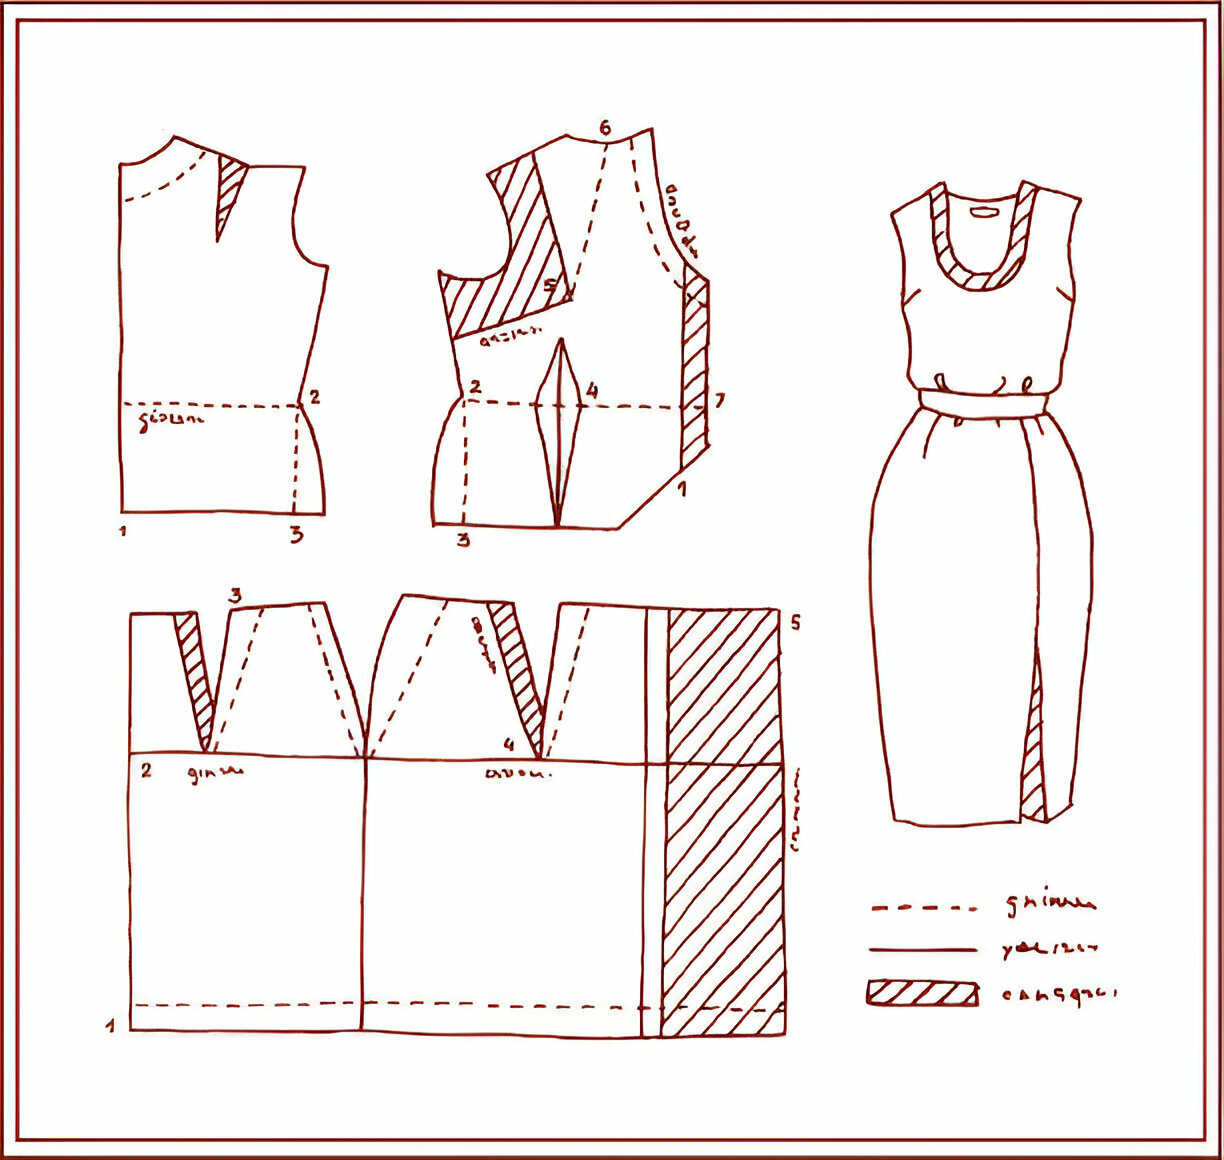
Instruction sheet – It’s a step-by-step guide on how to assemble your garments, including diagrams, fabric layout suggestions, and sewing techniques. It also explains pattern markings in the form of symbols like:
Solid lines—indicating the cutting lines for different sizes.
Dotted or dashed lines—represent stitching lines or fold lines.
Arrows (grainline markings) — show how to position the pattern to match the fabric grain.
Notches (small triangle) – help align pieces correctly when sewing.
Darts and pleats – indicate shaping details for a better fit.
Button and zipper placements – show where closures should go.
Tip – Never cut the notches outward, instead make a small inward cut to keep the edge clean. Before cutting anything, always read the entire instruction sheet to understand the steps.
Sewing Instruction – Once your fabric and pattern pieces are ready, the instruction sheet will guide you with:
Prepare your fabric – Before cutting, pre-wash and iron your fabric to prevent shrinkage and misalignment. Lay the fabric on a flat surface, to avoid wrinkles or distortions while pinning patterns with fabric. You can also use pattern weights to keep the pattern in place for precise cutting.
Pattern layout and fabric cutting – It provides diagrams showing how to layout pattern pieces on the fabric. These layouts take fabric width and grainline direction, ensuring that you align the grainline with the fabric’s straight grain to prevent distortion.
Marking and transferring details – Before assembling, transfer important markings with the help of fabric chalks, pens, or tracing paper from the pattern tissue to the fabric like darts, notches, pleats, and button placements.
Sewing order and assemble – It contains the sequence in which pieces should be sewn together. It starts with smaller construction steps such as darts and seams, before progressing to assembling larger sections.
Seam finishing and pressing – Many patterns include suggestions on seam finishing techniques like zigzag stitching or serging to prevent fraying. Pressing seams open or to one side at each stage enhances the garment’s final appearance and durability.
Final touches and fitting – Once the main construction is complete, the pattern instruction guides you through final elements such as hemming, adding closures (zippers, buttons, hooks,), and any decorative details.
Tip – Always sew on a scrap fabric before working on your actual project.
CONCLUSION
Reading a sewing pattern may be overwhelming at first, but with practice, it becomes easier. By understanding the pattern envelope, and contents inside, following step-by-step sewing instructions, and decoding the pattern sheet, you improvise yourself up for a successful sewing project. Mastering this skill will open up endless possibilities for creating custom garments with confidence and precision. And if you’re stitching without a machine, learning how to hand sew a seam can be a perfect starting point. .
