
How to Thread a Sewing Machine Easily? Step-by-Step Guide
Threading a sewing machine can look daunting, but with a few simple steps and regular practice, it will make you a pro in no time as I am one, believe it! Whether you are a newbie or a seasoned sewer, learning how to thread your machine properly is an essential skill that will save you time and ensure your projects turn out perfect. In this article, I will walk you through the easy-to-follow steps to thread your sewing machine confidentially and accurately. It will also include how to wind a bobbin, adjust tension discs, and handle the upper and lower threads. Let’s go.
What is the importance of the Sewing machine?
Before getting deep we should know the importance and necessity of sewing machines today. Despite the rise of fast fashion and automated manufacturing, let us know the reasons why:
- DIY: The DIY (do it yourself) movement is thriving with many individuals creating their own clothing, home decor, and accessories.
- Entrepreneurship – Many entrepreneurs depend on sewing machines to produce custom clothing, textiles, and accessories.
- Fashion Design: It is an essential tool for fashion designers, who bring their creativity of vision to life.
- Home Decor: Curtains, quilts, and upholstery are the home decor that can be created and altered.
What are the different parts of a Sewing Machine?

- Needle
- Presser foot
- Presser foot lifter
- Feed Dog
- Lever
- Bobbin, some machines have side-loading bobbins, too.
- Spool holder
- Bobbin Winder
- Extension table
- Reverse lever
- Dial for different stitches
- Dial for the width of the zig-zag stitch.
- Dial for the tension of the top thread in the machine
- Flywheel on the side of the machine.
- Foot Control Pedal
What are the key features of threading a sewing machine?
Threading a sewing machine is a step to prepare your device for sewing. It involves passing the thread through various machine parts to create a stitch. It includes the spool pin, lever, thread guide, tension discs, thread cutter, bobbin winder, and bobbin case.
- The spool pin is the thread’s starting point made with a metal rod that holds the thread spool in place. It is located at the top right side of the machine. “Note – Many machines have a vertical spool pin where gravity keeps the spool on the pin and in others there is a horizontal spool pin that requires a spool stopper preventing the thread from entangling and twisting.
- The take-up lever is in charge of moving the thread through the machine’s tension discs. As you turn the handwheel, the take-up lever moves up and down guiding the thread through the machine.
- The thread guide is a small metal or plastic component (depending on the model type), that directs the thread through the machine’s tension discs. It is located near the take-up lever. The thread guide helps to maintain the thread’s tension and prevents the thread from getting tangled.
- The tension discs are small metal or plastic components (depending on the model type) that regulate the thread’s tension. Located near the thread guide, it applies gentle pressure on the thread, ensuring neither it is too tight nor too loose. Make sure to adjust the tension disc correctly to prevent thread breakage or uneven stitching.
- The thread cutter is a small blade or scissors-like mechanism that cuts the thread at the desired length, trims the excess thread, and prevents tangle. It is located near a take-up lever.
- A bobbin is the part of a sewing machine on which the lower thread is wound. It assists the upper thread by making stitches on the bottom side of the fabric. It helps hold seams together. The upper thread and the lower thread loop together to form a strong stitch.
- A bobbin winder is a small mechanism that takes thread from the top thread spool and winds thread onto the bobbin. It is located on the top right side behind the spool pin.
- A bobbin case is a small metal or plastic component that holds the bobbin in place. It is located under the machine’s presser foot. It has a slit and the tension spring which help the bobbin thread is correctly positioned. “Note – The front load machine needs a bobbin case whereas the top load machine does not. Ensure the bobbin case is closed properly to prevent the bobbin from falling out.”
- The thread path refers to the route of the thread through the machine. It is mandatory to follow the correct thread path for proper stitch. “Note – Follow the user manual for specific threading instructions.
- The sewing needle is a small rod-like metal structure with a sharp pointed end and is the prime element of a machine. It has an eye-shaped opening at the tip of the needle known as a needle eye. It secures thread while sewing by carrying the upper thread down to meet the lower thread through the material and form a loop. Insert the thread through the needle from front to back using the built-in needle threader or manually. This step ensures the upper thread is ready to connect with the bobbin thread.
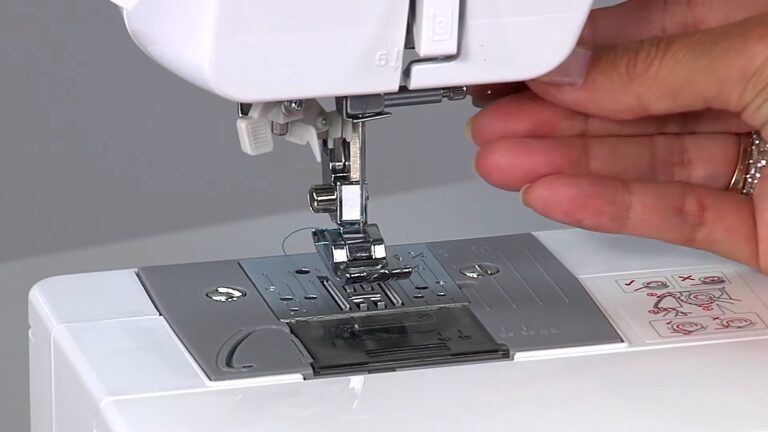
- The presser foot holds the fabric in place while sewing. When you lift the presser foot, it releases the tension discs, allowing the thread to pass through smoothly.
Summarizing the threading process
I hope you are now familiar with the different parts and their function. Let me summarize the process.
Step 1: Threading the upper thread:
Start by placing the thread spool on the spool pin and guiding the thread through components like the thread guide, tension disc, and take-up lever. “Note – Make sure the presser foot is raised to release tension on the thread and to move smoothly. Once the thread reaches the needle, insert it through the needle’s eye from front to back. Make sure you leave 3-4 inches of thread hanging to prevent it from being pulled back once sewing begins. Upper threading completed.
Step 2: Wind and insert the bobbin
Now, prepare the bobbin which holds the bottom thread. Wind the thread onto the bobbin using the bobbin winder and insert it into the machine’s bobbin case.
Note – This step is also known as how to wind a bobbin, which is crucial for smooth lower thread performance.
Step 3: Pull both threads under the presser foot
Finally, pull both the needle thread and bobbin thread under the presser foot about four inches. You are ready to start sewing.
Common threading mistakes and how to fix them:
The needle keeps unthreading – Make sure it’s a threaded front-to-back with enough tail.
Loose stitching – Check bobbin placement and adjust upper thread tension.
Bobbin thread not catching – Re-insert the bobbin and rethread the upper path.
FAQ:
1. What is the easiest way to thread a sewing machine?
Ans – Follow the upper thread path starting from the spool, going through the thread guide, tension disc, take-up lever, and finally the needle. A built-in needle threader can make it faster.
2. Why does my thread keep breaking while sewing?
Ans – This often happens when the upper thread isn’t secured with enough tail or the take-up lever isn’t at its highest point when starting. Also, check if the thread is going in the correct direction.
3. How do I wind a bobbin correctly?
Ans – Place the thread on the spool pin, pass it through the bobbin winding guide, then onto the bobbin. Engage the bobbin winder and press the foot pedal. Stop when it’s evenly filled.
4. Why is my sewing machine not picking up the bobbin thread?
Ans – Incorrect bobbin placement or improper threading of the upper thread could be the possible reasons. Also, ensure the needle is not dull or bent and is inserted properly.
5. How do I know if my tension is correct?
Ans – Balanced stitches on both sides of the fabric mean the tension is correct. If the upper or lower thread shows on the opposite side, then adjust the tension dial slightly.
6. How often should I rethread my sewing machine?
Ans – Whenever the thread breaks, stitches look uneven, you change thread spools, or after cleaning the machine. Rethreading ensures smooth and accurate stitching.
Conclusion
Threading a sewing machine is an essential skill for anyone or everyone who loves to sew. Practice makes perfect, take your time, follow the steps carefully and soon you will thread your machine. Remember, proper threading is the basics of smooth, hassle-free sewing that produces beautiful and professional quality projects. Happy sewing buddy!